We could earn a fee from hyperlinks on this web page.
Apple’s AirPods Professional are amongst one of the best wi-fi earbuds you should purchase, particularly if you happen to’re already entrenched within the Apple ecosystem. Like many Apple merchandise, AirPods Professional are fairly easy to arrange and use. Nonetheless, there are additionally loads of settings you need to be utilizing (and altering) from the default.
As a result of most of the options are present in the identical settings web page, here is some recommendation: Once I consult with AirPods Professional settings, I am speaking about these present in Settings > [Your AirPods] (iOS). You can too discover these choices in Settings > Bluetooth (iOS), or System Settings > Bluetooth (macOS), then by tapping the (i) (iOS) or Choices (macOS) subsequent to your AirPods Professional within the record.
Be aware that your AirPods Professional must be related to your system to entry these settings.
Disable system auto-switching
You probably have a number of Apple units, you may discover one thing attention-grabbing when utilizing AirPods Professional: Once you play media on a tool not related to your AirPods Professional, they’ll robotically hook up with that system. This characteristic is nice in principle, however generally is a actual ache if you could use a number of units without delay. Tapping a video in your iPhone will transfer your AirPods Professional out of your Mac to the telephone, even if you happen to don’t need it to occur.
When you can merely choose the notification that seems on the unique system to return the connection, there’s a solution to disable this characteristic if it isn’t best for you. In your AirPods Professional settings, head to Hook up with This iPhone or Hook up with This Mac. Now, select When Final Related to This iPhone or When Final Related to This Mac and your AirPods Professional received’t robotically swap to that iPhone.
For those who ever discover that you simply miss with the ability to robotically swap the audio output as you progress between units, you possibly can at all times return to this settings web page and select Mechanically as a substitute. For those who’re solely utilizing one audio supply at a time, this characteristic might be fairly handy. However if you happen to’re listening to music on one units—say, your iPhone—it’s a ache to have it cease if you happen to click on on, say, a YouTube video in your Mac.
Shortly swap between units with a faucet
Right here’s the tactic for switching between units that I favor: Once you wish to transfer your AirPods Professional to a different considered one of your units, head to Management Heart, press the AirPlay button within the top-right nook of the Now Enjoying window (Sound window on Mac), then select your AirPods Professional from the record. Give the earbuds a second to attach (lately, it is fairly darn fast), and also you’re all set.
Allow AirPods sharing
One actually cool iOS characteristic that works with appropriate headphones is the power to share audio to 2 totally different sources without delay. Meaning you possibly can pay attention via your AirPods Professional whereas your buddy listens via their AirPods or Beats.
To get arrange, head again to the AirPlay button in your Management Heart’s Now Enjoying window. Faucet Share Audio. If pairing AirPods or AirPods Professional, maintain them near your system with the AirPods contained in the case and open the lid. If pairing AirPods Max, maintain them near your system. If pairing Beats wi-fi headphones, put them in pairing mode and maintain them near your system.
Customise stem controls
Apple packed fairly a number of controls into the stems on AirPods Professional. You may long-press them to modify between Noise Management settings (Noise Cancellation, Transparency Mode, Adaptive Audio (AirPods Professional 2) and Off), however you may as well use fast presses to manage different areas:
-
One press to play or pause.
-
One press to reply or cling up a name.
-
Double-press to skip ahead.
-
Triple-press to skip again.
Modify the amount immediately from the stem (AirPods Professional 2)
You probably have a pair of second-generation AirPods Professional, you may as well modify the amount of the audio from the stem. Simply place your thumb on the stem, then use your index finger to tug up or down on the contact management to extend or lower the amount accordingly.
Use Adaptive Audio (AirPods Professional 2)
Transparency Mode is a superb characteristic that pumps within the ambient sound round you, so you possibly can both sustain with a dialog or concentrate on site visitors. AirPods Professional 2 enhance upon Transparency Mode with one thing referred to as “Adaptive Audio” (beforehand Adaptive Transparency) which block out sounds that attain 85dB or greater in actual time. You may even put on second-gen AirPods Professional to live shows due to how properly this characteristic works: You’ll hear all the pieces beneath 85dB as-is, and any noise louder than that comes via comfortably, like dynamic, high-tech earplugs.
You may allow Adaptive Audio from Management Heart: Lengthy-press the amount slider, then long-press Noise Management and select Adaptive. From right here, you possibly can customise the quantity of sound that your AirPods let in with this setting enabled. Head to Settings > Bluetooth, then faucet Extra Information subsequent to your AirPods. Faucet Adaptive Audio, then modify the slider to your desire.
Arrange Dialog Consciousness (AirPods Professional 2)
One other AirPods Professional 2-exclusive is Dialog Consciousness. With this characteristic, your AirPods can detect while you begin speaking to somebody, and can decrease the amount of audio playback and activate Transparency Mode. For those who’re listening to spoken media, like a podcast, your AirPods will pause playback after a number of seconds. To show this characteristic on or off, head to your AirPods settings and allow Dialog Consciousness. You will additionally discover this selection by long-pressing the amount slider in Management Heart.
Select Personalised Quantity (AirPods Professional 2)
On this identical settings web page, you may additionally discover Personalised Quantity. When enabled, iOS makes use of machine studying to grasp your listening habits, and adjusts the amount of your AirPods robotically.
Shortly swap between noise management modes from Management Heart
As a substitute of utilizing your AirPods Professional stem to modify between Noise Management modes, you are able to do the identical from Management Heart. Simply long-press or click on on the amount slider, then faucet the “Noise Management” choice within the backside left. Right here, you’ll discover your three Noise Management choices, “Noise Cancellation,” “Off,” and “Transparency.”
Customise your stem controls
By default, urgent the stem in your AirPods cycles between the Noise Management modes (properly, all however “Off,” however extra on that in a second). You may really customise these settings. You’ll discover the choices below Press And Maintain AirPods in your AirPods Professional settings. You may select “Left” or “Proper,” relying on which AirPod you wish to customise.
On the high, you’ll discover the choice to have a stem press activate Noise Management, or Siri. For those who select Noise Management, you possibly can decide into any and the entire three choices listed. It is a nice alternative so as to add “Off” to your record, since Apple doesn’t embrace it by default. I get pleasure from utilizing that setting after I can to avoid wasting battery life.
Activate Spatial Audio
Spatial Audio is a three-dimensional audio expertise that follows the motion of your iPhone. (You can too select to maintain Spatial Audio mounted in place.) Enabling it’s straightforward: Simply open Management Heart, long-press on the amount slider, then ensure that Spatial Audio.
Personalize your Spatial Audio expertise
Spatial Audio doesn’t should be the identical for everybody. The truth is, you should use your iPhone to take a scan of your ear and head form so as to personalize your Spatial Audio expertise. Your iPhone makes use of this scan to create a Spatial Audio profile for you, which syncs throughout your Apple units. That manner, Spatial Audio will render the sound the identical when listening in your iPhone, iPad, and Mac.
To get began, head to your AirPods Professional settings, select Personalised Spatial Audio, then hit Personalised Spatial Audio as soon as extra to stroll via setup.
Examine your case’s wi-fi charging gentle indicator
All AirPods Professional include a wi-fi charging case. As such, all of them have this neat trick: Along with your case on the wi-fi charger, faucet the highest of the case to carry up the charging indicator. Orange signifies that your AirPods Professional are nonetheless charging, whereas inexperienced means you’re good to go.
Discover the proper match

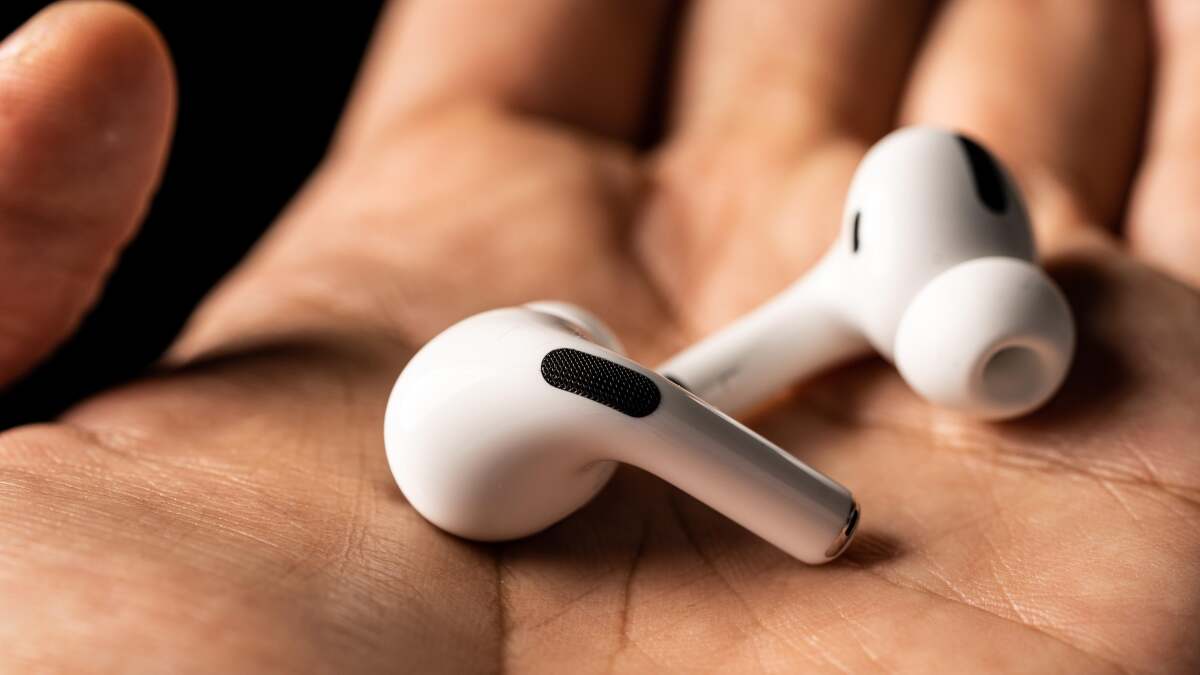
Credit score: Jake Peterson
One other distinction between AirPods and AirPods Professional considerations the various sizing choices. Not like the one-size-fits-all strategy of AirPods, the Professional fashions provide you with three or 4 totally different sized ideas to make use of. For those who don’t wish to decide a dimension your self, your iPhone has you coated.
Head again to your AirPods Professional settings on iOS, then faucet Ear Tip Match Take a look at. Faucet Proceed, be sure your AirPods Professional are tight in your ears, then faucet the play button to get began. Your iPhone will start taking part in music, testing the seal created by your AirPods. If the check finds all is nice, you’ll see “Good Seal” beneath your AirPods. If not, you may see “Modify or Attempt a Completely different Ear Tip.” It’s doable you’ll want a special dimension for every AirPod.
Rename your AirPods Professional
“Jake’s AirPods Professional” is ok, however what if I needed to name these earbuds one thing slightly extra enjoyable? For those who really feel the identical, head to Identify in your AirPods Professional settings, then sort no matter identify you’d like into the textual content area. On macOS, right-click in your AirPods Professional from the Bluetooth record and select “Rename.”
You may ping your misplaced AirPods Professional
For those who ever lose your AirPods Professional, don’t panic. In the event that they’re inside vary of a related Apple system, you possibly can have them make a chirping sound letting you recognize the place they’re.
To start out, open Discover My, then faucet the Units tab. Find and faucet in your AirPods Professional, then faucet “Play Sound.” In the event that they’re inside vary, iOS will let you recognize your AirPods are taking part in a sound. It really will get fairly loud, so that you may wish to double-check that no one is carrying them first.
See precisely the place your second-gen AirPods Professional are
When you can ping your AirPods to search out them quick, you won’t even must with AirPods Professional 2. The latest Execs assist exact location, which suggests you possibly can see precisely the place each earbuds and the charging case are via the Discover My app. Simply faucet Units, then the identify of your AirPods, then Discover.
The music doesn’t should cease while you take away an AirPod Professional
At this level, it’s a little bit of an AirPod staple to have your music cease while you take out one of many earbuds. Whereas definitely helpful, a few of us would favor to disable this characteristic, particularly if you happen to regularly set off it when adjusting your AirPods’s place. Plus, you possibly can pause music on AirPods Professional with a fast press of the stem, so it’s not fairly as important a characteristic as it’s on normal AirPods.
To disable the characteristic, simply faucet the toggle subsequent to Computerized Ear Detection in your AirPods Professional settings.
Select which AirPod Professional you wish to be the mic
Each of your AirPods have microphones in them, however solely considered one of them is ever energetic without delay. By default, the system switches between mics robotically, however you possibly can select to have one microphone at all times energetic. That is notably helpful in instances when considered one of your AirPods’ mics is damaged.
To decide on, head to Microphone in your AirPods Professional settings, then faucet All the time Left AirPod or All the time Proper AirPod.
Preserve your AirPods Professional above 80% when charging
AirPods Professional have what’s referred to as Optimized Battery Charging. This principally means your AirPods Professional cost as much as 80%, then maintain the cost there till it thinks you’ll want them absolutely charged. It’s a fantastic characteristic in principle, as a result of it cuts down on battery degradation, nevertheless it does imply that generally your AirPods Professional are solely charged to 80% while you go to make use of them.
To disable this characteristic, head to your AirPods Professional settings on iPhone, then faucet the toggle subsequent to Optimized Battery Charging. You’ll have the choice to Flip Off Till Tomorrow, if you happen to solely wish to disable the characteristic quickly, or Flip Off to close the characteristic down for good. You may learn extra about this characteristic and why it may be actually useful right here.
Allow noise cancellation when utilizing one AirPod Professional
You don’t must be carrying each AirPods to get pleasure from noise cancellation. To unlock noise cancellation when solely carrying one AirPod, head to Settings > Accessibility > AirPods in your iPhone, then faucet the toggle subsequent to Noise Cancellation With One AirPod.
Announce Notifications and Calls with Siri
Everytime you obtain a brand new message with Announce Notifications with Siri, the digital assistant will politely interrupt no matter you occur to be doing when listening to AirPods so as to learn incoming texts. It’s a fantastic characteristic, nevertheless it’s not for everybody. Right here’s methods to handle it.
On iOS, head to Settings > Apple Intelligence & Siri > Announce Notifications. To disable the characteristic completely, faucet the toggle subsequent to Announce Notifications. You can too faucet the toggle subsequent to any app within the record to disable the characteristic for that app solely. Some apps could allow you to select between saying all notifications in addition to simply “time-sensitive” alerts.
There’s additionally Reply With out Affirmation. Disabled by default, this setting lets Siri ship your responses with out studying it again to you first. It may be handy, but additionally harmful. You received’t know if the assistant misheard you earlier than sending off your reply.
You are able to do the identical for calls: Head to Settings > Siri > Announce Calls, then select both All the time, Headphones & Automotive, Headphones Solely, and By no means.
For those who do hold this setting on, and you’ve got a pair of second-gen AirPods Professional, you possibly can handle these requests silently by nodding or shaking your head. If Siri proclaims you have got an incoming name, you possibly can nod to just accept the decision. If the assistant says you have got a notification, you possibly can dismiss it by shaking your head.
Tune your audio to your liking
Whereas AirPods Professional sound nice by default, you may be somebody who enjoys fine-tuning their audio expertise. Apple helps you to try this in your iPhone in Settings > Accessibility > Audio & Visible > Headphone Lodging. Right here, you possibly can tune your audio for Balanced Tone, Vocal Vary, or Brightness, and have mushy sounds boosted barely, reasonably, or strongly. Apple helps you to change these settings round and faucet “Play Pattern” to listen to the variations.
You’ll discover an much more customized expertise by tapping Customized Audio Setup. Apple will stroll you thru customization for telephone calls, motion pictures, music, and Transparency Mode. By the top, you’ll have a completely distinctive sound expertise together with your AirPods Professional.
Allow Dialog Enhance
Dialog Enhance is a superb characteristic tucked away in these Headphone Lodging settings. When enabled, your AirPods concentrate on the particular person in entrance of you whereas lowering different noises, making conversations simpler to listen to in noisy environments. You may study extra about Dialog Enhance from our information right here.
Use Voice Isolation
Voice Isolation is a implausible and underused Apple characteristic for telephone and video calls. With it enabled, your Apple system focuses in your voice throughout calls, and blocks out extraneous sounds in your space. You may nonetheless have the ability to hear your canine barking whereas on a name, however, hopefully your coworkers will not have the ability to. Large Spectrum is an alternative choice right here, which brings in extra sounds out of your environment right into a name. That may be helpful if you actually need everybody to listen to what’s occurring in your finish of the road—however, personally, I nearly at all times use Voice Isolation as a substitute.
This characteristic used to work solely when utilizing the microphone in your iPhone, iPad, or Mac, however as of iOS 18, it really works with AirPods Professional 2 as properly. The following time you are on a name whereas utilizing AirPods Professional, pull up Management Heart, then faucet the “Controls” choice on the high of the display screen. Right here, swap to Voice Isolation.
Allow Stay Pay attention
Stay Pay attention turns your iPhone right into a microphone that may enable you hear your environment higher via your AirPods. To allow the characteristic, head to Management Heart in your iPhone, faucet the (+), then seek for “Stay Pay attention.” Add this setting tile to your Management Heart, then return to Management Heart and faucet it. Once you do, your AirPods will pump in all of the sounds your iPhone mic can decide up. You can too fine-tune your Transparency Mode settings right here, if you happen to tweaked it in Customized Audio Setup.
Management your AirPods Professional modes together with your Apple Watch
In case your AirPods Professional are related to your Apple Watch, you possibly can swap between Noise Management modes from there. Pull up Management Heart in your watch, then faucet the AirPlay button.
Unpair your AirPods in the event that they’re performing up
In case your AirPods Professional simply aren’t performing proper, generally one of the best factor to do is to easily unpair them. You are able to do this simply on iPhone by heading to your AirPods Professional settings, then by tapping “Neglect This Gadget.” Faucet “Neglect This Gadget” as soon as extra on the pop-up, and your AirPods will likely be eliminated out of your system’s reminiscence. You are able to do the identical on Mac by right-clicking your AirPods from the record and deciding on “Take away.”
Now, you possibly can simply maintain the case open by your iPhone as you probably did while you first bought your AirPods Professional to re-pair them.