Paint is the least expensive, best renovation you are able to do: it makes every part recent and new, it covers defects, and it’s one thing virtually anybody can do to an inexpensive stage of high quality.
In the event you simply learn that final half and began shaking your head as a result of your paint tasks all the time end up terribly—patchy, or with seen sheen or brush strokes, or a last shade that doesn’t appear to match what you selected within the retailer in any respect—the trigger most likely isn’t your work ethic, or an evil spirit inhabiting your home. The issue most likely lies in your prep work. If all you’re doing earlier than you begin slapping paint on the partitions is making use of some painter’s tape and protecting the furnishings, the probabilities that the ultimate paint job will look horrible are literally fairly excessive. Listed here are all of the issues it is best to take note of earlier than you dip that brush.
Think about temperature and humidity
The climate can have an effect on the standard of your paint job. Excessive temperature or humidity can have an opposed affect on the drying time. At colder temperatures, paint can thicken, extending its drying time. At hotter temperatures, it could actually dry too shortly, affecting adhesion. Excessive humidity that leaves moisture on the partitions may also lead to a sub-par paint job.
Your house might be local weather managed, so portray inside even throughout excessive climate is definitely potential—simply be certain that the temperature is between 50 and 90 levels and the humidity ranges are between 40 and 60%.
Prep the partitions
It’s often a good suggestion to wash your partitions earlier than portray them to make sure there is no such thing as a mud or grime that would adversely have an effect on adhesion. When you’re at it, search for cracks, dents, peeling tape, or different defects and patch every part up (together with crayon or grease stains that may most likely present by way of your paint except they’re scrubbed off). A small flaw that isn’t noticeable now would possibly grow to be a evident downside when a recent coat of paint brings it to the forefront.
Cleansing partitions with a dry microfiber material adopted by heat water and a sponge is often adequate, except your partitions are actually soiled. In the event you’re fearful about it, add a small quantity of dish washing liquid or trisodium phosphate (in case your partitions are greasy and really soiled)—however keep away from coloured soaps that may depart a tint behind.
Select the appropriate rollers
One large purpose paint jobs seem like crap? The nap in your curler cowl. The nap of your curler describes the thickness of the fibers. Typically talking, the smoother your wall floor is, the smaller the nap of your curler cowl ought to be. Portray kitchen cupboards? Go together with a 1/4-inch nap. Portray a brick wall? An inch or perhaps a 1 1/4-inch nap is greatest. Smaller fibers choose up much less paint, whereas thicker fibers maintain extra paint—a too-short nap can lead to a patchy end on tough surfaces, whereas a too-long nap can add undesirable texture to clean surfaces. Most inside paint jobs will name for a nap between 3/8 inch (very clean partitions) and three/4 inch (textured partitions, like stucco).
Apply a separate primer coat
Nowadays you should purchase paint and primer collectively, which is a terrific time saver. But when your partitions aren’t in nice form, even after cleansing and patching, you’ll often get a significantly better outcome with a separate primer coat. This step may not be 100% essential in your partitions, however taking the additional time to prime correctly will assure the very best end result.
Determine the paint’s undertones
Virtually all paint has an undertone (its base shade )and a masstone (its general hue). The undertone could be delicate and troublesome to suss out, which is why it’s so essential to color just a few samples on the wall earlier than you commit. The paint’s undertone will work together with every part else within the room in ways in which aren’t all the time apparent within the retailer. You introduced house a beige paint, for instance, nevertheless it has a inexperienced undertone, and abruptly it appears to be like all incorrect in your partitions as a result of your wooden floors have yellow undertones.
You possibly can ask concerning the paint’s undertone on the retailer the place you’re shopping for it. It’s also possible to use a shade wheel to match it to main colours to get a way of the undertones concerned.
What do you suppose to date?
Mix a number of buckets of paint
In the event you’re portray a small room and utilizing only one can of paint, you’re good to go. In case your mission is bigger and also you’ll be utilizing a number of cans of the identical shade, it is best to mix all of your paint into a bigger bucket and blend it up—a course of referred to as “boxing.” This can be a good concept as a result of even in the event you purchased your paint from the identical retailer on the similar time, there could be delicate variations between cans. Perhaps the pigments dispersed incorrectly, or the blending course of was barely off. Regardless of the purpose, even the tiniest variation between cans will probably be extremely apparent once you change to the brand new can. Boxing it eliminates the hazard.
Try your window tint
Your home windows can throw a wrench into your paint colours. It’s because many home windows have a really delicate inexperienced tint as a result of presence of iron oxide within the glass. This isn’t noticeable in any approach to the bare eye, as a rule, however it could actually forged a greenish tint in your paint that’s simply robust sufficient to make it look inexplicably incorrect within the daylight. Placing samples on the wall to guage the colour is a superb concept—however be sure to paint these samples in a spot the place the sunshine out of your home windows will hit them. Samples that look excellent in a extra shadowed space could abruptly look bizarre when gentle hits it by way of the window.
Work out the colour temperature of your lights
One other lighting subject is your gentle bulbs. All of the bulbs you’re utilizing in your lighting fixtures have a shade temperature, and that may have an effect on how your paint appears to be like. Typically talking, bulbs with larger shade temperatures will brighten darker paint and mute lighter colours and vice versa. Because of this a paint shade that appears terrific in daylight can abruptly look grim or light at evening when the lights come on. It’s greatest to test your samples in every kind of sunshine to be sure to’ve chosen properly—and alter your bulbs to assist your paint if essential.
You must also test the shade rendering index (CRI) of your bulbs. This can be a ranking between 50 and 100 that signifies how correct the colour rendering of the bulb will probably be. A CRI of 90 to 100 will present your paint as precisely as potential, decreasing the probabilities that it’ll look worse when the solar goes down.
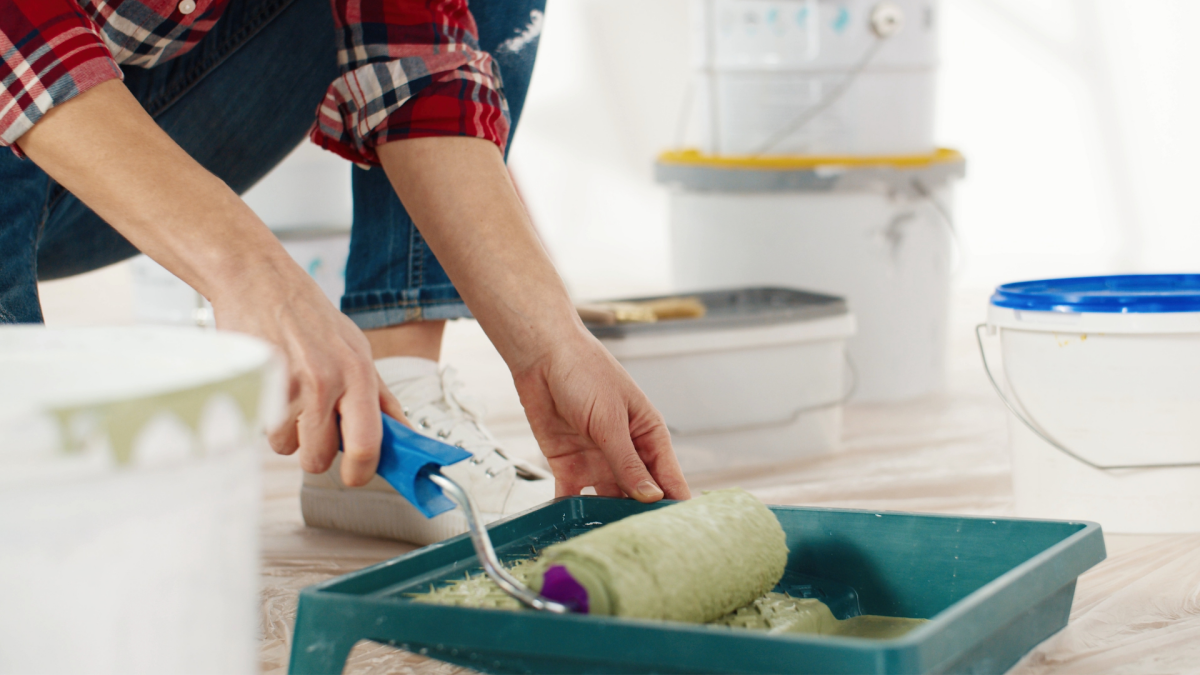
Load your curler up
Lastly, when truly portray, don’t be shy along with your curler. When initially “loading” paint onto a dry cowl, take your time and work paint deep into the nap. This will take a couple of minutes, so don’t rush—you desire a good, moist curler once you hit the wall. When portray, don’t roll till the curler is exhausted—reload often and hold the nap damp. Exhausting your curler will simply depart streaks and faint spots which will or could not get lined by a second coat—and will or could not hang-out you for years afterward.